Upcycle Dollar Tree wastebaskets into a shimmering, functional side table featuring a glowing LED tabletop.
Disclosure: As an Amazon Associate, links in this post may earn me a small commission at no cost to you.
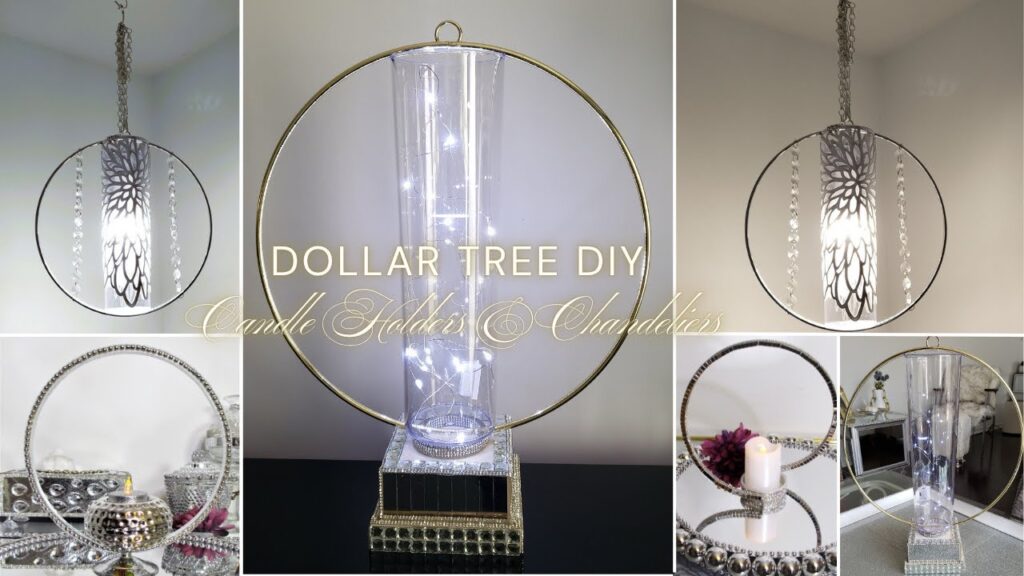
High-End Storage and Lighting on a Budget
Who knew that basic wire wastebaskets could actually look this expensive? This project transforms everyday organization items and silver plastic spoons into a “boutique-style” side table. Standing at nearly 21 inches tall, this piece isn’t just for show—it features hidden storage inside. And I placed a battery-operated LED light inside which creates a stunning ambient glow at night. It’s the perfect high-glam addition to any cozy reading nook or bedside.
📺 WATCH: See how I use Dollar store table mats and fabric to turn them into soft, plush pillows here.
Materials
Browse my curated list of Favorite Craft Supplies, Tools & Embellishments.
-
2 White wired wastebaskets (Dollar Tree)
-
1 Extra-large clear plastic round bowl
-
1 Silver or white charger plate
-
1 Round mirror (removed from its frame)
-
3 packs of silver plastic spoons
-
Loose flat-back clear acrylic gems (assorted sizes)
-
Silver rhinestone ribbon
-
Silver beaded necklace
Tools
-
Hot Glue Gun
-
Fix-All Adhesive
-
Scissors
-
Level (highly recommended!)
-
Foam Brush
-
Nylon cable ties: For securing the baskets.
-
Adhesives: E6000 or Fix-All Adhesive
-
Metallic Paint Marker (to colour-match the cable ties)
-
LED Puck Light (for optional ambient lighting)
💡 Sandy’s Crafting Tips & Hacks
-
The Leveling Secret: Since you are stacking wire baskets, the most challenging part is ensuring the table isn’t lopsided. Use a mini level from the dollar store as you glue. Adjust the basket while the glue is still tacky until the bubble is perfectly centered.
-
Crystal Clusters: To give the tabletop a “designer” texture, use the convex (curved out) part of your silver spoon tips. Glue three medium gems down the center and three smaller ones on each side. These clusters make the charger plate look like a heavy, custom-carved piece of furniture.
-
Removable Tabletop: Do not glue the charger plate to the top of the wastebasket. By leaving it loose, you can easily reach inside the “pedestal” to use it as storage for blankets or magazines, and you can quickly click the LED light on or off.
-
Mixed Adhesive Strategy: For the structural body of the table, always use a combination of Fix-All for a permanent, structural hold and hot glue for that instant “tack” that keeps things from sliding while you work.
Instructions
1. Embellish the Base Bowl: Take your extra-large clear plastic bowl and turn it upside down. Apply a row of silver rhinestone ribbon along the top outer edge. This bowl will serve as the sturdy foundation for your table.
2. Prep the “Crystal” Spoons: Snap the round parts off 62 silver plastic spoons. Using hot glue, adhere your clear gems to the back (convex side) of each spoon tip. This creates a brilliant, reflective pattern.
3. Design the Tabletop: Take your charger plate and glue the round mirror to the center. Frame the mirror with a string of silver beaded necklace. Glue your embellished spoon tips around the rest of the plate’s surface. This plate will catch and reflect the light from your LED push light beautifully.
4. Assemble the Pedestal Body: Apply Fix-All and hot glue to the bottom of the first wastebasket and set it upside down onto the clear bowl. Use your level to ensure it is straight. Once set, apply glue to the rim of the second wastebasket and place it right-side up on top of the first. This creates an hourglass-shaped pedestal.
5. Hide the Seams: Wrap a row of silver rhinestone ribbon around the center point where the two wastebaskets meet. This hides the glue and wire connection, making the base look like one continuous, decorative unit.
6. Light It Up: Apply the LED push light to the center-back of your finished charger plate using its self-adhesive backing. Place the plate on top of the wire baskets. Simply push down on the center of the plate to activate the glow!
Related Content
▶️ Watch Next: Glam DIY Furniture ideas.
▶️ Browse the Collection: See all my Furniture DIY’s here.
💎 Join the Community
Don’t miss a single transformation! Subscribe to my Youtube Channel for weekly step-by-step video tutorials.
Disclaimer: I’m not a professional. All my DIY’s are for entertainment purposes.