This article is adapted from a video originally published on YouTube on Feb. 20, 2021.
Disclosure: As an Amazon Associate, links in this post may earn me a small commission at no cost to you.
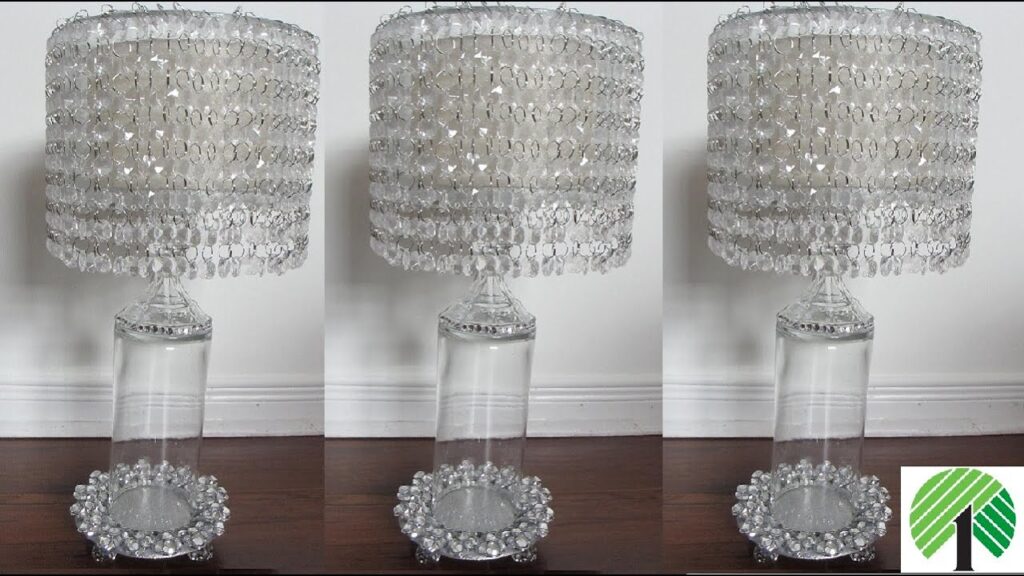
I am a huge fan of finding clever ways to use basic glassware, and these solar-powered lamps are one of my favourite projects to date! I often find myself stocking up on these glass candlestick holders whenever I see them in stock because they are so versatile. By stacking a few of these pieces and adding a simple garden stake light, I was able to create a pair of tall, shimmering lamps that look absolutely beautiful as a centrepiece on my dining table without any messy cords or expensive batteries.
📺 WATCH: See the glass solar lamp come to life here:
Materials
Browse my curated list of Favorite Craft Supplies, Tools & Embellishments here.
- 3 Glass candlestick holders (Dollar Tree)
- 1 Shallow round glass votive
- 1 Solar stake light
- Glass marbles (assorted colours/sizes for weight)
- Battery-operated LED tea light (optional alternative)
Tools
- E6000 industrial adhesive (or Fix-All)
- Hot glue gun and glue sticks
- Goo Gone (for label removal)
💡 Sandy’s Crafting Tips & Hacks
- The “Glass Shift” Warning: When you are building a tall base out of glass-on-glass, the pieces can be very slippery before the glue sets. I really recommend setting your base aside for a few hours to allow the glue to cure properly before you move on; this prevents the glassware from shifting and becoming lopsided.
- Stability is Key: Because plastic and glass components can be top-heavy, I use glass marbles to add “expensive” weight. Not only does this look pretty through the clear glass, but it keeps the lamp from toppling over when you place the solar unit on top.
- Inventory Tip: Dollar Tree typically sells these candlestick holders all year round, but they do run low on inventory often. My secret is to grab several whenever I see them so I always have enough for a matching set.
Instructions
- Prep the Glassware: I start by removing all the tags from the glass candlestick holders. If they leave behind a sticky residue, I like to use a bit of Goo Gone to get the surface perfectly clean so the glue can bond properly.
- Form the First Joint: I apply a generous amount of E6000 to the rim of the mouth of the first candlestick holder. It is so important to use a permanent adhesive here rather than just hot glue because you want a solid, long-term hold.
- Stack the Neck: I take the second candlestick holder, turn it upside down, and place it directly onto the first one so the two mouths meet. I always double-check that they are standing up perfectly straight before the glue begins to set.
- Construct the Base: Next, I apply my adhesive to the edge of the bottom of the glass votive and place it at the very bottom of my stacked holders. This votive forms a sturdy, wide base for the lamp.
- Add Weighted Detail: Once I’m sure the base and neck are sturdy enough, I proceed by placing glass marbles inside the top of the candlestick holder (the one that is currently upside down). This gives the lamp that nice weight I prefer, though you can skip this if you don’t feel you need it.
- Final Stack: I apply another coat of E6000 to the base of the top candlestick holder and place the third holder right on top. The two bases should meet together to complete the long neck of the lamp.
- Prepare the Solar Unit: I take a solar stake light and remove the top part containing the mini solar panels. I always put the stake itself aside for a future project! To get the lamp to function, I gently pull on the orange tab near the top to activate the battery.
- Light It Up: To finish, I simply place the solar piece inside the top opening of the final candlestick holder. My glass solar lamp is now complete and ready to catch the sun during the day so it can glow beautifully at night.
Related Content & Resources
▶️ Watch Next: More DIY Candle Holder and Lighting Solutions (No wiring required)
▶️ Browse the Collection: See all my Lighting DIY’s
💎 Join the Community
Don’t miss a single transformation! Subscribe to my Youtube Channel for weekly step-by-step video tutorials.
Disclaimer: I’m not a professional. All my DIY’s are for entertainment purposes.