Turn dollar store picture frames, chopping mats, and solar lights into luxury, wireless wall decor for a fraction of the boutique price.
Disclosure: As an Amazon Associate, links in this post may earn me a small commission at no cost to you.
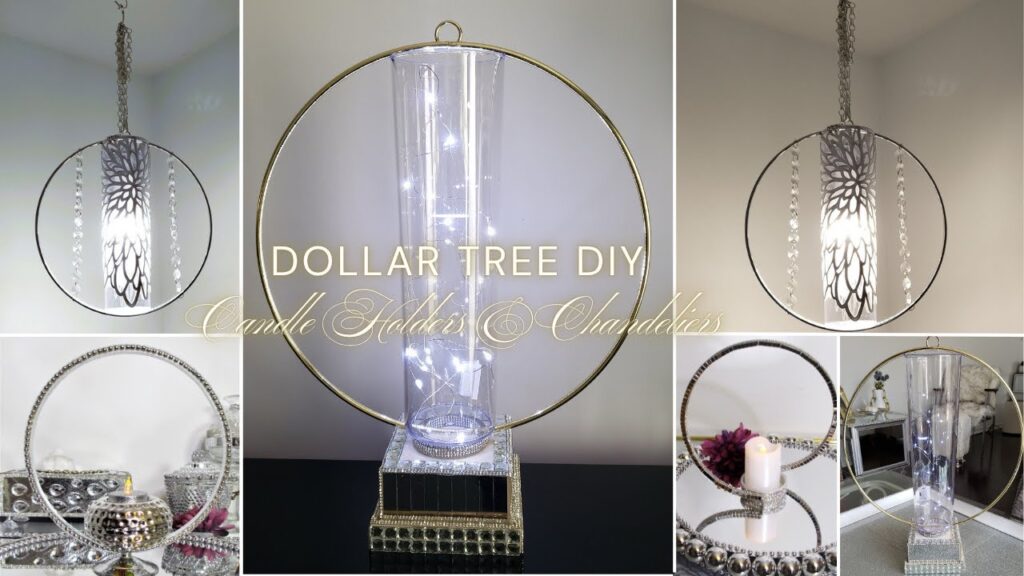
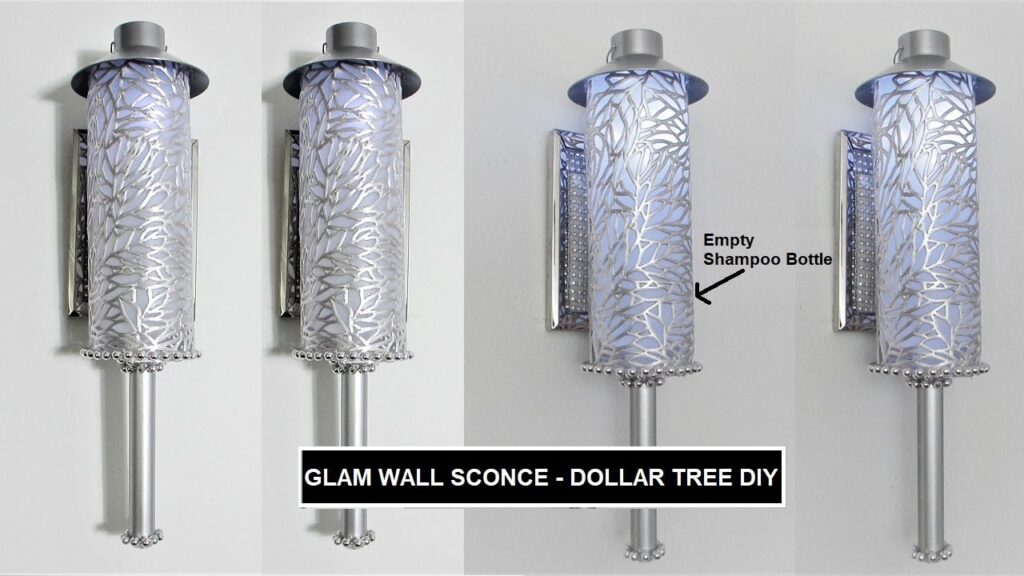
Adding high-end looking lighting to your home doesn’t always require an electrician or a massive budget. With a little imagination and creativity, I’ve managed to tranform basic Dollar Tree items like plastic chopping mats, napkin holders, and solar garden sticks, into stunning wall sconces that look like they came from Z Gallerie. I will show you how these eight projects featuring everything from crystal “waterfall” effects to sleek, modern chrome finishes can really “light up” your space.
📺 WATCH: See how simple dollar store items can transform into beautiful lighting solutions here.
Materials
Browse my curated list of Favorite Craft Supplies, Tools & Embellishments.
-
Dollar Tree Picture Frames (Various sizes)
-
Plastic Chopping Mats (11×14)
-
Solar Garden Sticks (Silver chrome or black)
-
Wire Napkin Holders
-
Teardrop-Shaped Ornament Balls (Clear)
-
Silver Beaded Necklace & Rhinestone Ribbon
-
Acrylic Hanging Crystals & Diamond Gems
-
Square Mirror Tiles (4×4)
-
Rechargeable LED Puck Lights
Tools
-
Fix-All or E6000 Adhesive
-
Hot Glue Gun (High heat)
-
Hot Knife or Soldering Tool
-
Box Cutter
-
Gem Picker Tool
💡Sandy’s Crafting Tips & Hacks
-
The “Sink-In” Pilot Hole: When working with plastic frames or thick materials, use the hot tip of your glue gun to melt a small pilot hole. You’ll feel the tip “sink” in, letting you know it’s deep enough for a screw or hook.
-
The Tassel Finial Hack: Repurpose large crystals from curtain tassels and glue them to the bottom of solar garden sticks. It adds immediate weight and a “boutique” finish to your lighting fixtures.
-
Hidden Hanging Hardware: Don’t buy expensive mounts. Cut the metal hook out of the cardboard backing of a dollar store picture frame. Glue the entire cardboard piece to your sconce for a secure, flat-lying hold.
-
Mess-Free Glittering: When applying vase filler or glitter, work inside a deep bowl or box to catch the “bounce.” This prevents a massive cleanup on your workspace.
Instructions
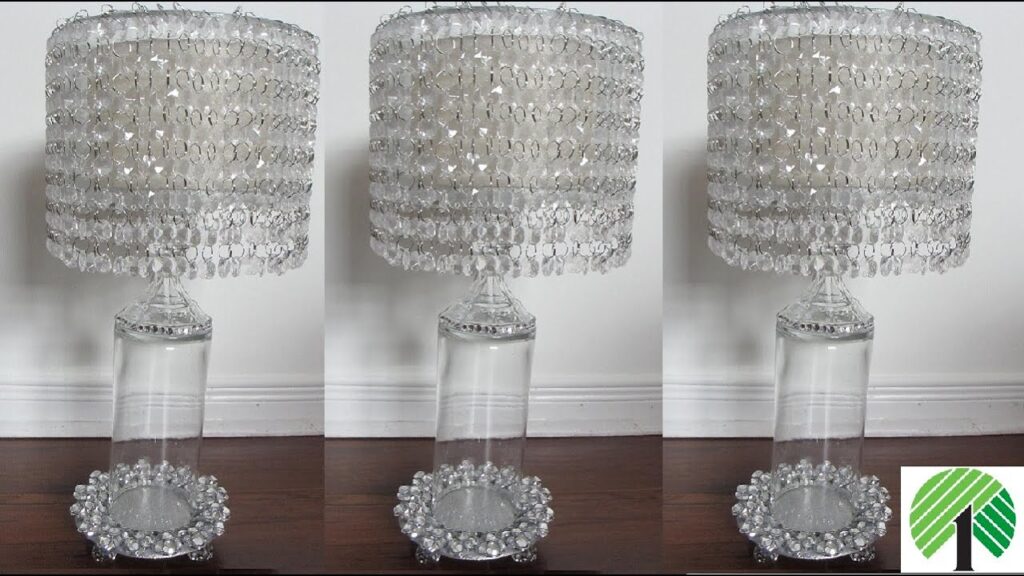
1. The Teardrop Mirror Frame Sconce
-
Prep the Frame: Replace the stock photo in a small mirror-finish frame with designer craft paper.
-
Assemble the “Stem”: Glue two solar garden sticks together and wrap them in a silver beaded necklace.
-
Light It Up: Thread battery-operated string lights through the stick and into a teardrop ornament bulb. Screw the cap on and glue the bulb to the top of the stick.
-
Mount: Adhere the stick to the front of the frame and hide the battery pack behind the frame.
2. The Crystal Dowel Sconce
-
Glitter the Supports: Wrap two 12-inch wooden dowels in self-adhesive silver glitter paper.
-
Build the Frame: Secure the dowels vertically into a wire napkin holder using hot glue and white nylon zip ties for extra security.
-
Bling: Glue silver spoon handles vertically across the napkin holder. Fill the gaps between the handles with large diamond gems.
3. Double Napkin Holder Sconce
-
Combine: Fix-All and zip tie two napkin holders side-by-side.
-
Embellish: Decorate with spoon arms and gem stickers. Loop string lights through the back for an ambient glow.
4. Waterfall Mirror Sconce
-
Mirror Backdrop: Glue four square mirror tiles to a wood panel. Fill any gaps with mini mirror tiles.
-
The Crystal Drape: Attach the panel to a napkin holder. Use ornament hooks to hang acrylic crystal garlands from the wire, creating a waterfall effect.
-
Solar Power: Insert an embellished solar garden light vertically into the center.
5. Floating Crystal Corridor Light
-
The Suspension: Use nearly invisible fishing wire to hang several crystal ornaments from a napkin holder.
-
Light Source: Place a battery-operated Puck Light on top to illuminate the crystals from above.
6. Solar Vase Sconce
-
Build the Lens: Glue a silver bangle to the bottom of a clear acrylic vase.
-
Insert Solar: Mount a solar garden light inside the vase (ensure solar panels face out).
-
Waterfall Rim: Glue ornament hooks with crystals to the inner rim of the vase. Mount the entire vase to a mirrored picture frame.
7. The Mosaic Solar Cube
-
Form the Cube: Glue four small picture frames together (one with rhinestone mesh inside).
-
The Light Mount: Create a foam board base with a hole cut in the center. Insert a long, rhinestone-wrapped solar pole through the base so the light sits inside the cube.
8. Fancy Frame Mirror Panel
-
Backdrop: Glue mirror tiles to a wood panel.
-
Frame Detail: Cut a section of a fancy plastic round mirror frame to match the panel’s width. Paint it silver and glue it to the top.
-
The Light: Assemble a string-light teardrop bulb on a beaded stick (like Project 1) and mount it to the center of the mirrored panel using foam spacers.
Related Content & Resources
▶️ Watch Next: More DIY Wall Sconce Ideas
▶️ Browse the Collection: See all my Lighting DIY’s
💎 Join the Community
Don’t miss a single transformation! Subscribe to my Youtube Channel for weekly step-by-step video tutorials.
Disclaimer: I’m not a professional. All my DIY’s are for entertainment purposes.