Upscale ordinary plastic charger plates into luxury wall sconces, side tables, and mirrored trays.
Disclosure: As an Amazon Associate, links in this post may earn me a small commission at no cost to you.
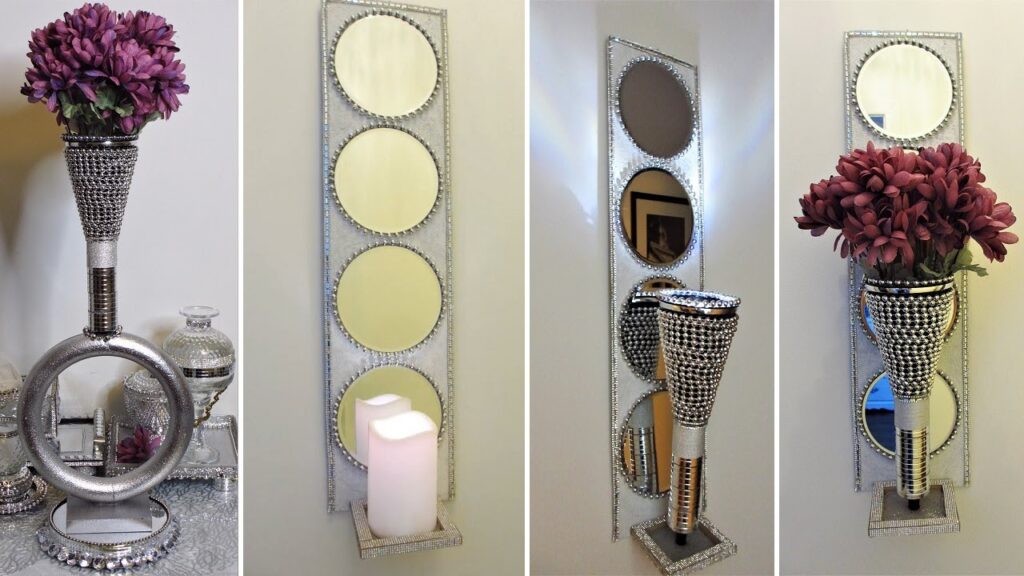
I used to see charger plates only as table settings, but they are actually one of the most versatile items in the dollar store. From modern Z Gallerie-inspired wall sconces to functional lit side tables, I’ll show you 7 ways how to use mirrors, gems, and wire baskets to “glam up” your charger plates for just a few dollars.
📺 WATCH: See the Charger Plates Transform into Luxury Decor here.
Materials
Browse my curated list of Favorite Craft Supplies, Tools & Embellishments.
-
Round and Rectangular Silver Charger Plates
-
White Wire Wastebaskets
-
12-inch and 5-inch Frameless Mirrors
-
Clear Plastic Bowls
-
Silver Plastic Spoons & Silver Napkin Rings
-
Mini Mirror Tiles & Clear Glass Gems
-
Silver Beaded Necklace
-
Jar Lid & Plastic Serving Spoon
-
LED Puck Light & LED Taper Candles
Tools
-
Fix-All Adhesive & Hot Glue Gun
-
Liquid Chrome Paint Markers (Silver, Gold, Copper)
-
Heavy-Duty Double-Sided Tape (Stretchy)
-
Hot Knife (for cutting plastic)
-
Gem Picker Tool
💡Sandy’s Crafting Tips & Hacks
-
The Lit-Base Strategy: To create a glowing furniture piece, mount an LED Puck Light to the underside of your charger plate. When placed on a clear or wire base, it illuminates the entire structure and turns a simple table into a mood-lighting feature.
-
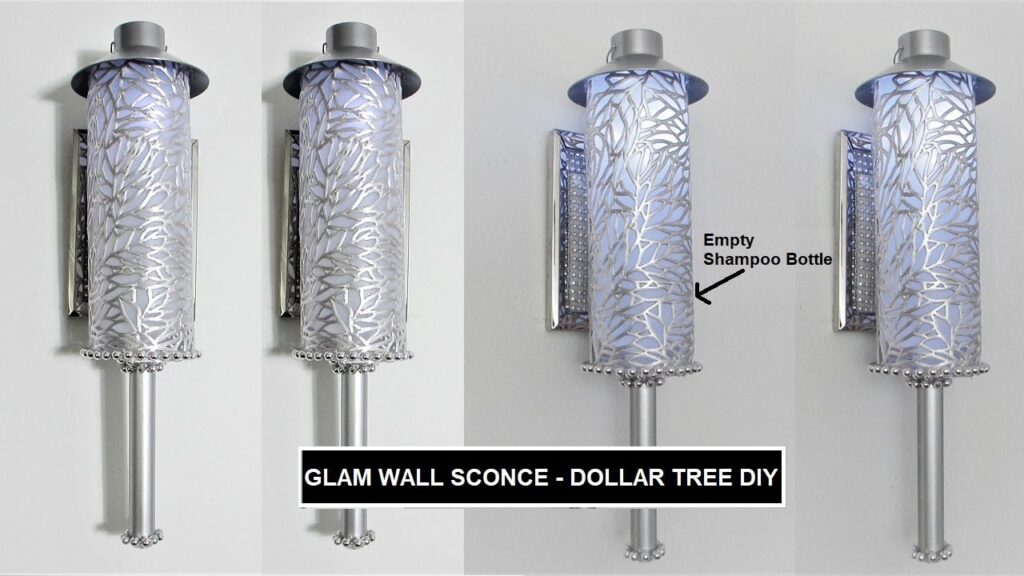
Z Gallerie “Beakman” Dupe: You can recreate expensive designer wall sconces by using a painted jar lid as a candle platform and a plastic spoon handle as the decorative “stem.” It looks like heavy metal once painted with a chrome marker!
-
The “Numb Finger” Safety: If you aren’t used to high-heat hot glue, use clear tacky glue or a gem picker tool. It saves your fingertips from burns and prevents messy glue strings on your gems.
-
Secure Wall Hanging: Since charger plates are plastic, standard hooks don’t always stick. Cut the metal hook out of a dollar store picture frame’s cardboard backing and glue the entire cardboard piece to the plate with Fix-All for a rock-solid hold.
Instructions
1. The Illuminated Wire Basket Side Table
-
Prep the Base: Invert a clear plastic bowl and glue a silver rhinestone ribbon around the rim.
-
Stack the Baskets: Connect two white wire wastebaskets (one upside down, one upright) using zip ties or Fix-All to create an hourglass shape.
-
Create the Top: Embellish the rim of a round charger plate with “Crystal Clusters” (bejeweled spoon heads).
-
Light It: Mount a Puck Light to the bottom-center of the plate and set it on top of the wire baskets.
2. Crystal Frame Round Mirror
-
Mount Hook: Secure a cardboard-backed frame hook to the back of a silver charger plate.
-
Center Mirror: Glue a round mirror to the center of the plate using Fix-All.
-
Bling the Border: Glue rows of square clear gems around the mirror. Finish by lining the mirror’s edge with a silver beaded necklace.
3. Z Gallerie Inspired Beakman Wall Sconce
-
Mirror the Base: Apply self-adhesive mini mirror tiles to the center of a rectangular charger plate.
-
Build the Sconce: Paint a jar lid and a plastic serving spoon handle black.
-
Assemble: Glue the lid horizontally to the plate and attach the spoon handle vertically underneath it to act as a support stem. Add gem stickers for detail.
4. Tiered Mirror Vanity Tray
-
Double the Plates: Glue two charger plates back-to-back. Wrap the seam in a silver beaded necklace.
-
Add Feet: Glue three silver napkin rings in a triangle formation to the bottom.
-
Surface: Center and glue a 12-inch mirror to the top. Frame the mirror with silver ornament balls for a high-end look.
5. 3D Flower Wall Art Set
-
Canvas Prep: Add a row of gem stickers around the rim of three charger plates.
-
“Sketch” with Beads: Use silver beaded necklaces to create curved stems.
-
Petal Detail: Build flowers at the top of the stems using white pearls, clear beads, and teardrop gems.
6. Bangle Gallery Mirror Tray
-
Elevate: Glue three large diamond gems to the bottom of a charger plate.
-
The Gallery Rail: Stand clear plastic shower curtain rings (snapped shut) vertically around the plate’s edge and secure with hot glue.
-
Reflect: Glue a round mirror to the center and hide the edge with silver beaded necklace.
7. Mosaic Glass Gem Mirror
-
Mirror Placement: Glue a 5×5 inch mirror to the center of a charger plate.
-
Gem Fill: Use Fix-All to fill the entire remaining space of the plate with clear glass gems.
-
Tight Gaps: Use smaller glass marbles to fill the tiny gaps between the larger gems near the outer edge.
Related Content & Resources
▶️ Watch Next: More Charger Plate Crafts
▶️ Browse the Collection: See all my Charger Plate DIY’s
💎 Join the Community
Don’t miss a single transformation! Subscribe to my Youtube Channel for weekly step-by-step video tutorials.
Disclaimer: I’m not a professional. All my DIY’s are for entertainment purposes.