Turn basic Dollar Tree solar lights into beautiful, cordless table accents with three unique designs.
Disclosure: As an Amazon Associate, links in this post may earn me a small commission at no cost to you.
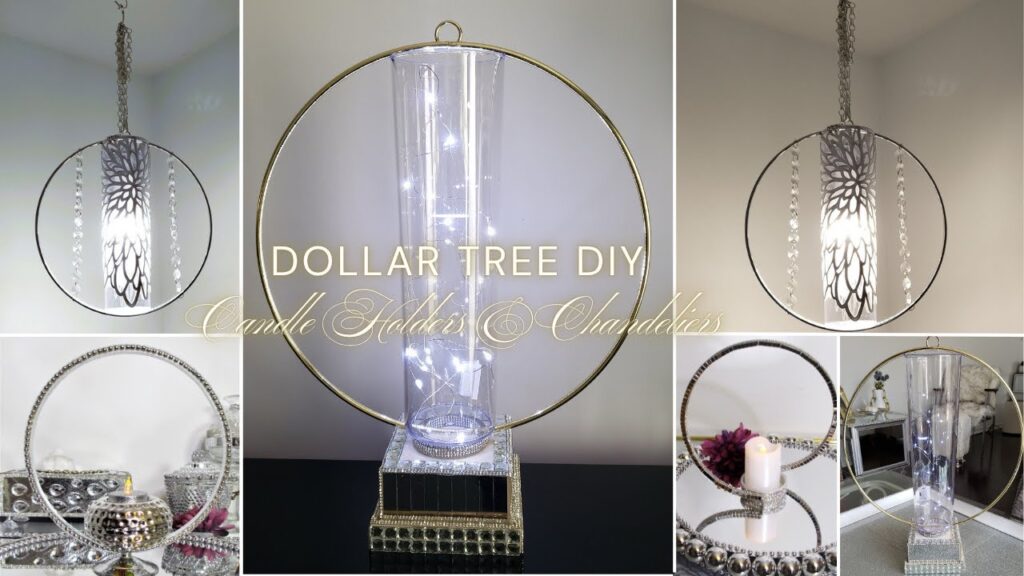
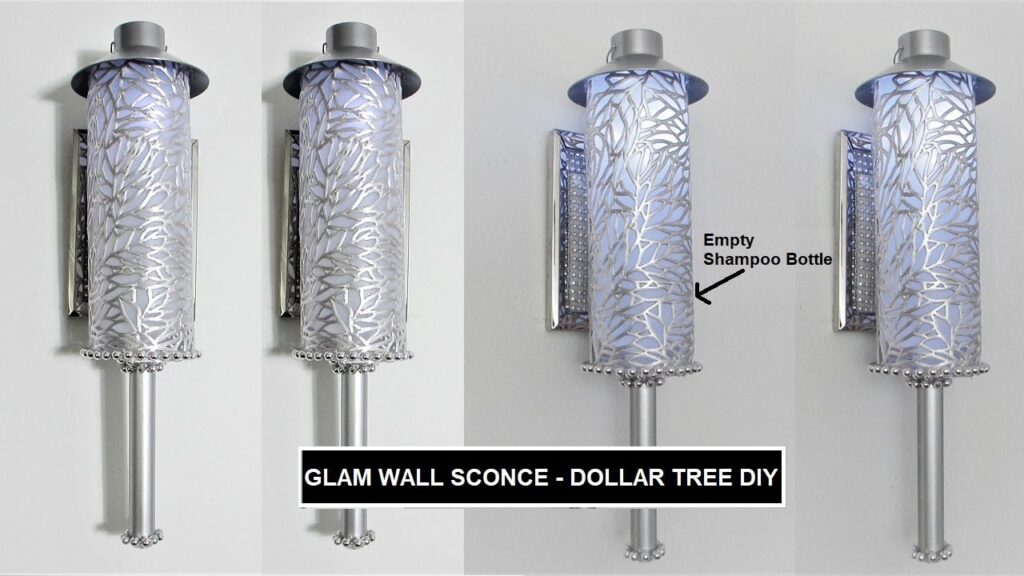
I love finding ways to take items that usually end up in the recycle bin and turning them into designer-inspired showpieces. For this project, I’m so excited to show you three different ways to style these glam solar lamps using some of my favourite Dollar Tree finds. These lamps are perfect for adding a bit of sparkle to any room or even your patio table, all without needing a single light bulb or an electrical outlet.
📺 WATCH: See these 3 stunning solar lamp designs come to life here.
Materials
Browse my curated list of Favorite Craft Supplies, Tools & Embellishments
-
Solar garden stakes (Dollar Tree)
-
Round frameless mirrors (for the base)
-
Plastic wine glass base
-
Silver napkin rings
-
Clear plastic bowl (for Style 2 lampshade)
-
Silver rhinestone ribbon
-
Clear acrylic gems
-
Glass marbles (optional, for adding weight)
Tools
-
Hot glue gun and glue sticks
-
Fix-All or E6000 adhesive
-
Glass cleaner
-
Scissors
💡 Sandy’s Crafting Tips & Hacks
-
The Fingerprint Clean-Up: When working with mirrors and chrome finishes, I always keep my favourite glass cleaner handy. It’s so easy to leave fingerprints behind while you’re gluing, and a quick wipe at the end is the secret to getting that professional shine.
-
The “Hot Glue Race”: I have to warn you—when you’re applying gems with hot glue, you only have a second or two to get them positioned perfectly before the glue sets! I definitely learned to eyeball my placement first so I didn’t end up with a crooked gem that was stuck for good.
-
Light Diffusion: For the styles that use a bowl as a lampshade, I found that the light bounces beautifully off the gems and mirrors, creating a stunning shadow pattern on the walls. It’s the perfect way to add a calm ambiance to your space.
Instructions
Project 1: The Modern Chrome Pedestal Lamp
-
Prepare the Foundation: I start by taking a round mirror and cleaning it thoroughly to remove any marks. I then adhered a plastic wine glass base to the centre of the mirror using a bit of permanent adhesive for a secure hold.
-
Frame the Base: To pull the look together, I wrapped a thin strip of rhinestone ribbon around the outside of the wine glass base. I love using this ribbon because it hides any glue seams and adds that extra bit of sparkle.
-
Embellish the Solar Unit: Next, I carefully applied gems to the upper portion of the solar light unit. I made sure to position them perfectly before the hot glue set! I also covered the sides with more rhinestone ribbon so the original black plastic was completely hidden.
-
Final Assembly: To finish style number one, I just applied some glue to the end of the solar stick and secured it vertically onto the base.
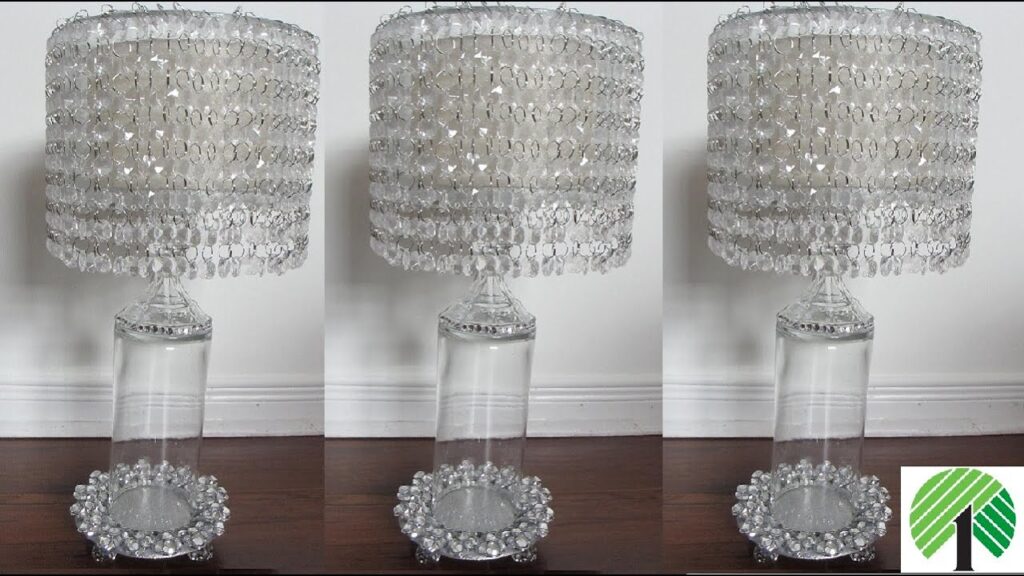
Project 2: The Lampshade Design
-
Invert the Shade: This style is so quick to put together! I took a clear plastic bowl, turned it upside down, and used it as a lampshade. I simply rested it right over the top of the solar light assembly to give it a more traditional lamp silhouette.
Project 3: The Napkin Ring Column Lamp
-
Modify the Stem: For my third design, I removed the solar light from the stick. This allowed me to slide several silver napkin rings onto the stick, stacking them up to create a thick, chrome-finished column.
-
Secure the Rings: I used small dollops of glue to adhere the napkin rings to each other so they stayed perfectly straight. Once the column was full, I replaced the solar light back onto the top of the stick.
-
The Reveal: I was so excited to see this one at sunset! The light bounces beautifully off the gems and the mirror base, creating a gorgeous shadow effect all over the wall.
Related Content & Resources
▶️ Watch Next: More DIY Table Lamp Designs (No wiring required)
▶️ Browse the Collection: See all my Lighting DIY’s here.
💎 Join the Community
Don’t miss a single transformation! Subscribe to my Youtube Channel for weekly step-by-step video tutorials.
Disclaimer: I’m not a professional. All my DIY’s are for entertainment purposes.