Basic plastic spoons paired with a round mirror turn into a stunning, one-of-a-kind showpiece that works as a centerpiece or a high-end wall display.
Disclosure: As an Amazon Associate, links in this post may earn me a small commission at no cost to you.
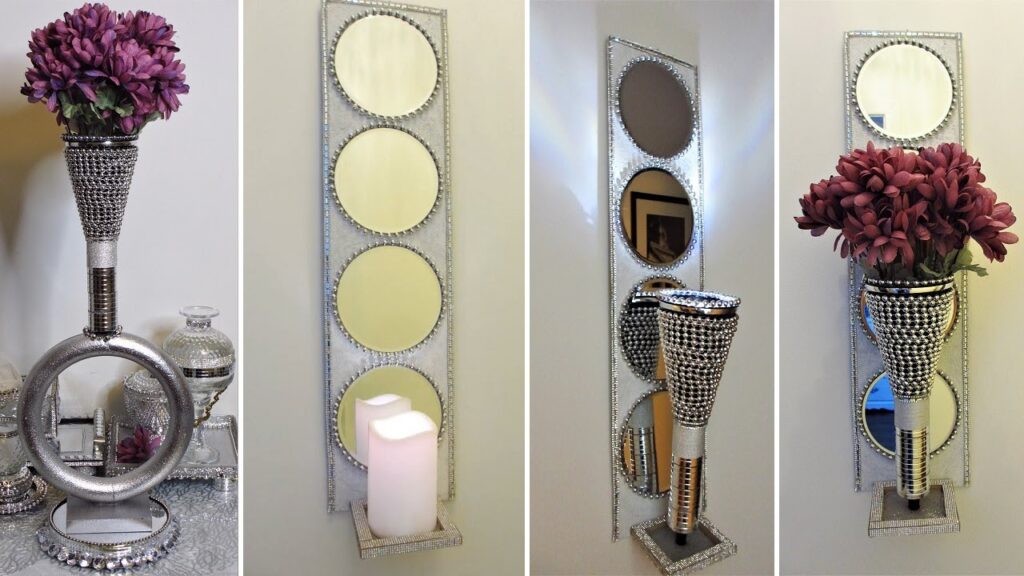
I’m always looking for ways to see the hidden beauty in everyday items, and these clear plastic spoons are a perfect example. I love the elegant, curved shape of the spoon bowls—they look almost like delicate glass petals when you use them the right way. Today, I’m going to show you how I used these simple dollar store finds to create a high-impact piece that can serve as a glowing candle holder, a stand for a vase, or even a striking 3D wall mirror that looks like a metallic flower in bloom.
📺 WATCH: See how I turn Dollar Tree spoons into beautiful home decor here.
Materials
Browse my curated list of Favorite Craft Supplies, Tools & Embellishments.
-
Clear plastic spoons
-
Silver plastic spoons (24 pack)
-
Medium-sized round mirror
-
Silver beaded necklace
-
Fix-all adhesive
-
Well-Bond or white glue
-
Clear round gem stickers
-
Silver ribbon (optional for refreshing old candles)
Tools
-
Hot glue gun and glue sticks
-
Scissors
-
Dry paintbrush (for removing glue strings)
-
Glass cleaner
💡 Sandy’s Favorite Crafting Tips & Hacks
-
Glue Management: When working with clear materials like these spoons, it is so important to dispense your hot glue in very small amounts. This prevents the glue from clumping up around the edges and keeps your project looking professional and clean.
-
The Dry Paintbrush Trick: Once my glue has cooled, I love to take a dry paintbrush and sweep it over the surface. It’s my favorite way to twirl away those pesky “spiderweb” glue strings instantly.
-
The Seamless Border: If you have a visible gap or seam between two materials—like a mirror and its backing—use a beaded trim or necklace. It’s a great way to hide the joint while adding a touch of elegance.
-
Refreshing Old Decor: Don’t throw out candles that have yellowed over time. I like to wrap mine in coordinated ribbons to give them a fresh, high-end look that matches my new decor.
-
Maximum Bonding: For a secure hold, I always recommend using a combination of white glue and Fix-All. The Fix-All gives that extra strength needed to make sure the mirror stays firmly attached to its backing.
Instructions
-
Prepare the Backing: Disassemble your round framed mirror and place the cardboard backing onto your table with the built-in hook facing down. Trace the shape of the mirror onto the cardboard, then cut out the circle with your scissors.
-
Mount the Mirror: Apply a combination of white glue and Fix-All to the side of the cardboard circle without the hook. Press the mirror firmly onto the cardboard so it is secure.
-
Frame the Seam: Use hot glue to adhere the silver beaded necklace all along the border edge of the mirror. This hides the seam between the glass and the cardboard backing perfectly.
-
Embellish the Spoons: Take eight clear plastic spoons and use hot glue to attach the silver beaded necklace all around the outer rim of the spoon bowls. Remember to use small amounts of glue so it doesn’t clump.
-
Create the Layered Look: Break off the round heads from your silver plastic spoons and glue one face-down into the center of each clear spoon bowl. This adds a beautiful metallic detail to the “petals”.
-
Position and Secure: Evenly space your eight decorated spoons around the edge of the mirror. Once you’re happy with the layout, glue them down.
-
Reinforce the Build: Carefully flip the entire piece over and apply extra hot glue to the back of the spoons where they meet the cardboard. This ensures everything stays very firm.
-
Final Polish: Flip the mirror back over. Use your dry paintbrush to remove glue strings and wipe down the mirror with glass cleaner to remove any fingerprints.
-
The Glam Factor: For the final touch, add a row of small clear round gem stickers down the center of each spoon handle for that extra bit of sparkle.
Related Content & Resources
▶️ Watch Next: More Spoon Craft Ideas
▶️ Browse the Collection: See all my Tabletop DIY’s
💎 Join the Community
Don’t miss a single transformation! Subscribe to my Youtube Channel for weekly step-by-step video tutorials.
Disclaimer: I’m not a professional. All my DIY’s are for entertainment purposes.